Accredible Quick Start Guide
Overview articles give background information and provide context to a particular subject. Their goal is to explain a concept, not to teach or give instructions.
Common Terminology
Groups
A group contains all the information related to a credential. This information includes the name of the achievement, the appearance of the group(a badge or certificate), the email that is sent when students achieve the credential, and its visibility.
Designs
Designs are the visual representation of a credential. It usually takes the form of a badge or certificate. Accredible has a built-in design tool for creating badges and certificates.
Credentials
A credential is the achievement that students receive upon completion of the requirements.
Attributes
Attributes are a placeholder value. They can be used in designs, or in emails as placeholders. An example of this would be [recipient.name]. If John Doe were to receive a credential, then [recipient.name] would be replaced with John Doe in the email or on the credential.
Creating a Group
Info & Appearance
On the Accredible website, click the “Group” tab in the top menu. This will take you to a page containing a list of groups. In the top right corner, you can click the button to create a group. When you first creae a group, you will be brought to the Info and Appearance page, where you need to enter details like the Display Name.
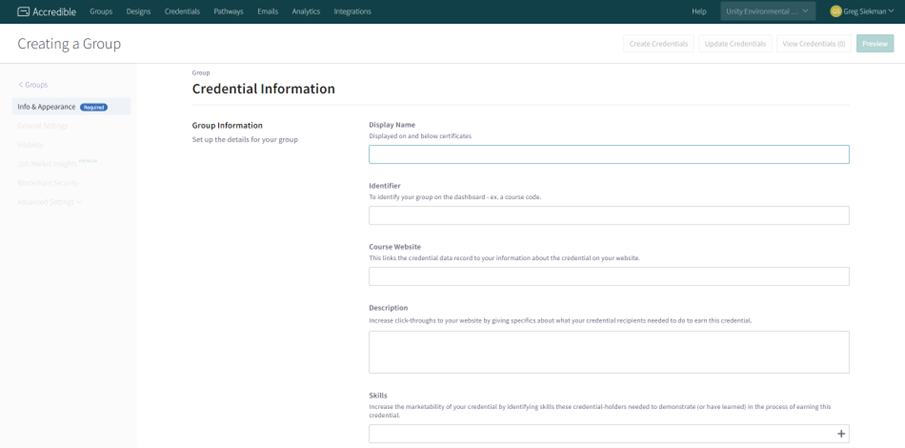
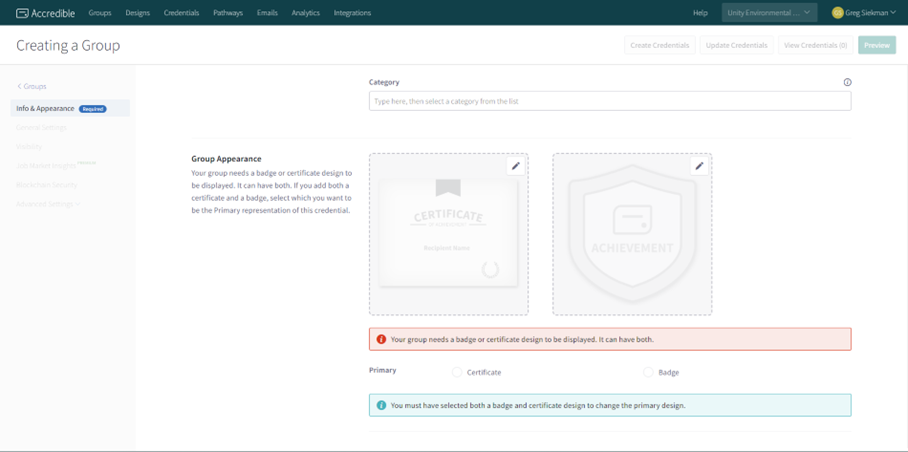
Once you’ve provided the group information, you will proceed to group appearance. This is where you can select a pre-made credential design. If you’re planning on using a design that needs to be uploaded, upload it to the Designs tab before trying to add it to the group. The appearance can be either a certificate or a badge. If you upload both a badge and certificate design, you will need to choose which of the two is the primary design.
Last, you are given the choice to add Earning Criteria, which would serve as a prerequisite for earning this credential. This earning criteria is not enforced by Accredible, it’s merely informational for the learner or any institute who might be interested in what the learner achieved before earning this credential that led them to it.

Once you’ve entered this information, you can save the group. There are advanced options for visibility, blockchain, and other features. Once the Info and Appearance page is filled out, the group will have the necessary information.
Creating a Design
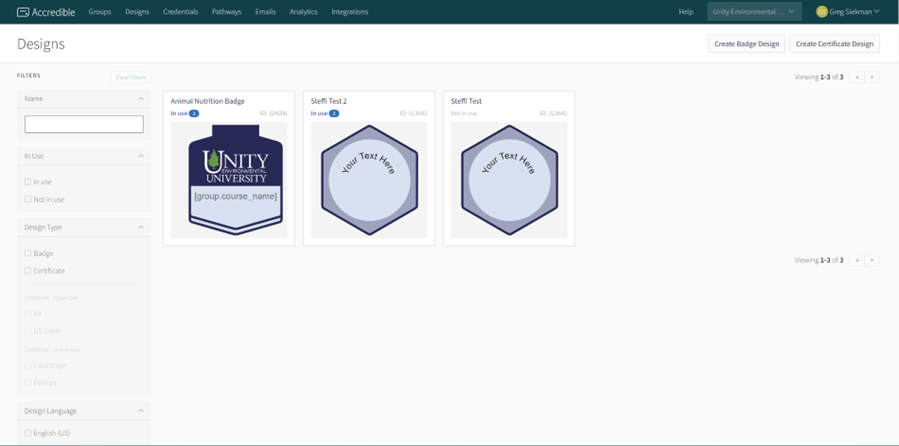
The Designs page will open to display all the current designs. This page is searchable via text, or filterable by criteria to find the design you are looking for. To create a design, click on the “Create (Type of Credential) Design” in the top right corner of the screen.
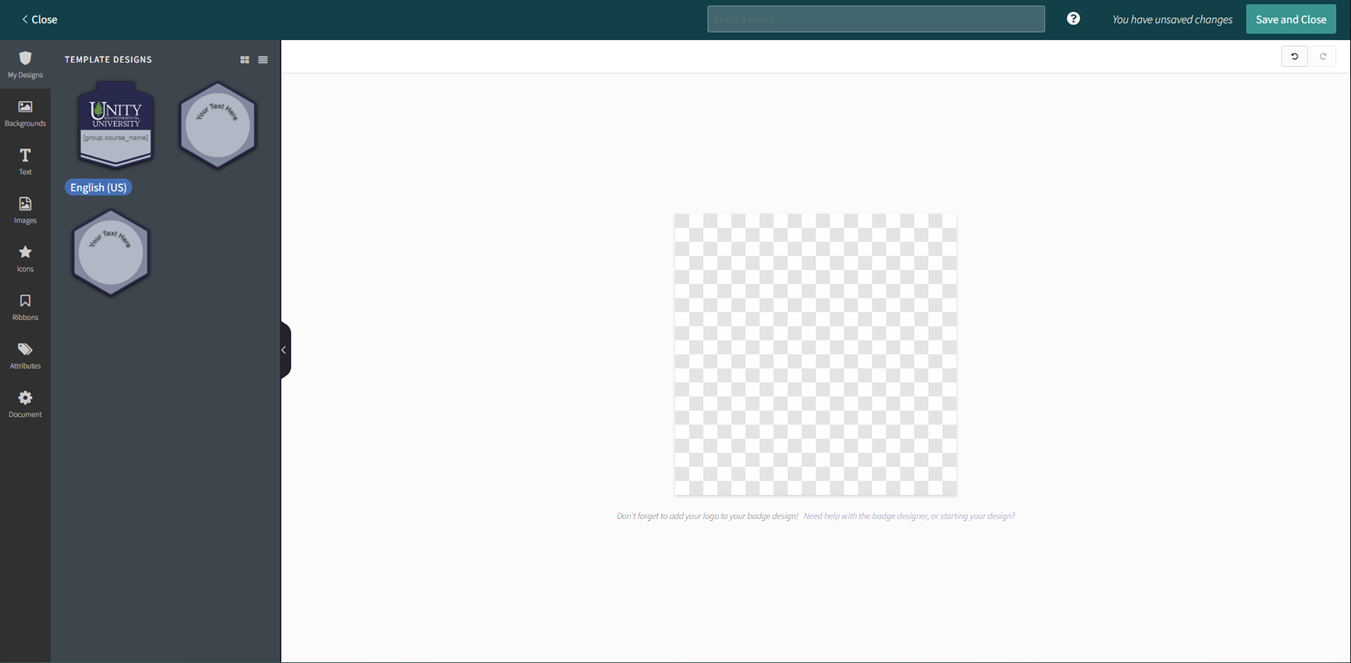
This will open the Credential Designer page, where you will be able to upload images, add text, and on. It offers a selction of backgrounds to choose from. You have the option to upload an image designed outside of Accredible from the Images tab. The Attributes tab allows you to use attributes as a placeholder that will be populated when the credential is awarded (if you wanted to use the same design for different badges, you could use [group.course_name] and the badge will populate with the name of the credential.) Once you’re satisfied with the design, you can save it and it will be available for use in a Group.
Credentials Tab
The credentials tab displays each instance when a credential is awarded. You can search for credentials and filter them by values such as collections, status, or visibility. In the top right, you can either update existing credentials or create credentials en masse by uploading a spreadsheet with receiver information.
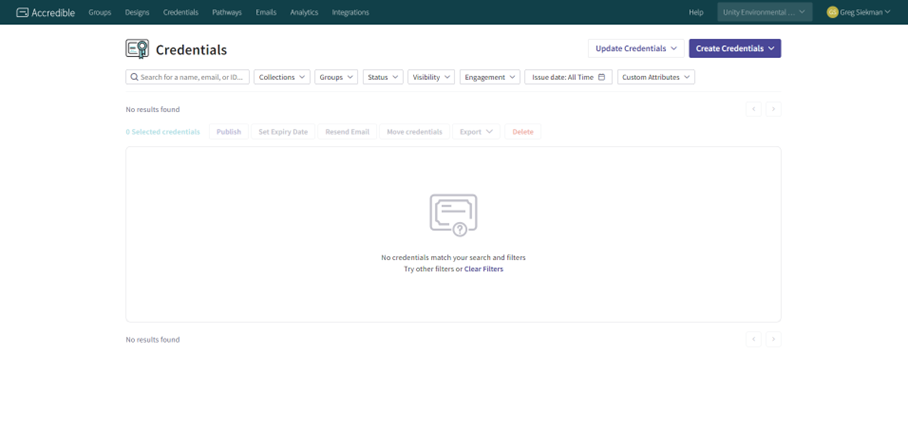
Creating a credential from the button will prompt you to upload a spreadsheet with the information for the people receiving the credential.
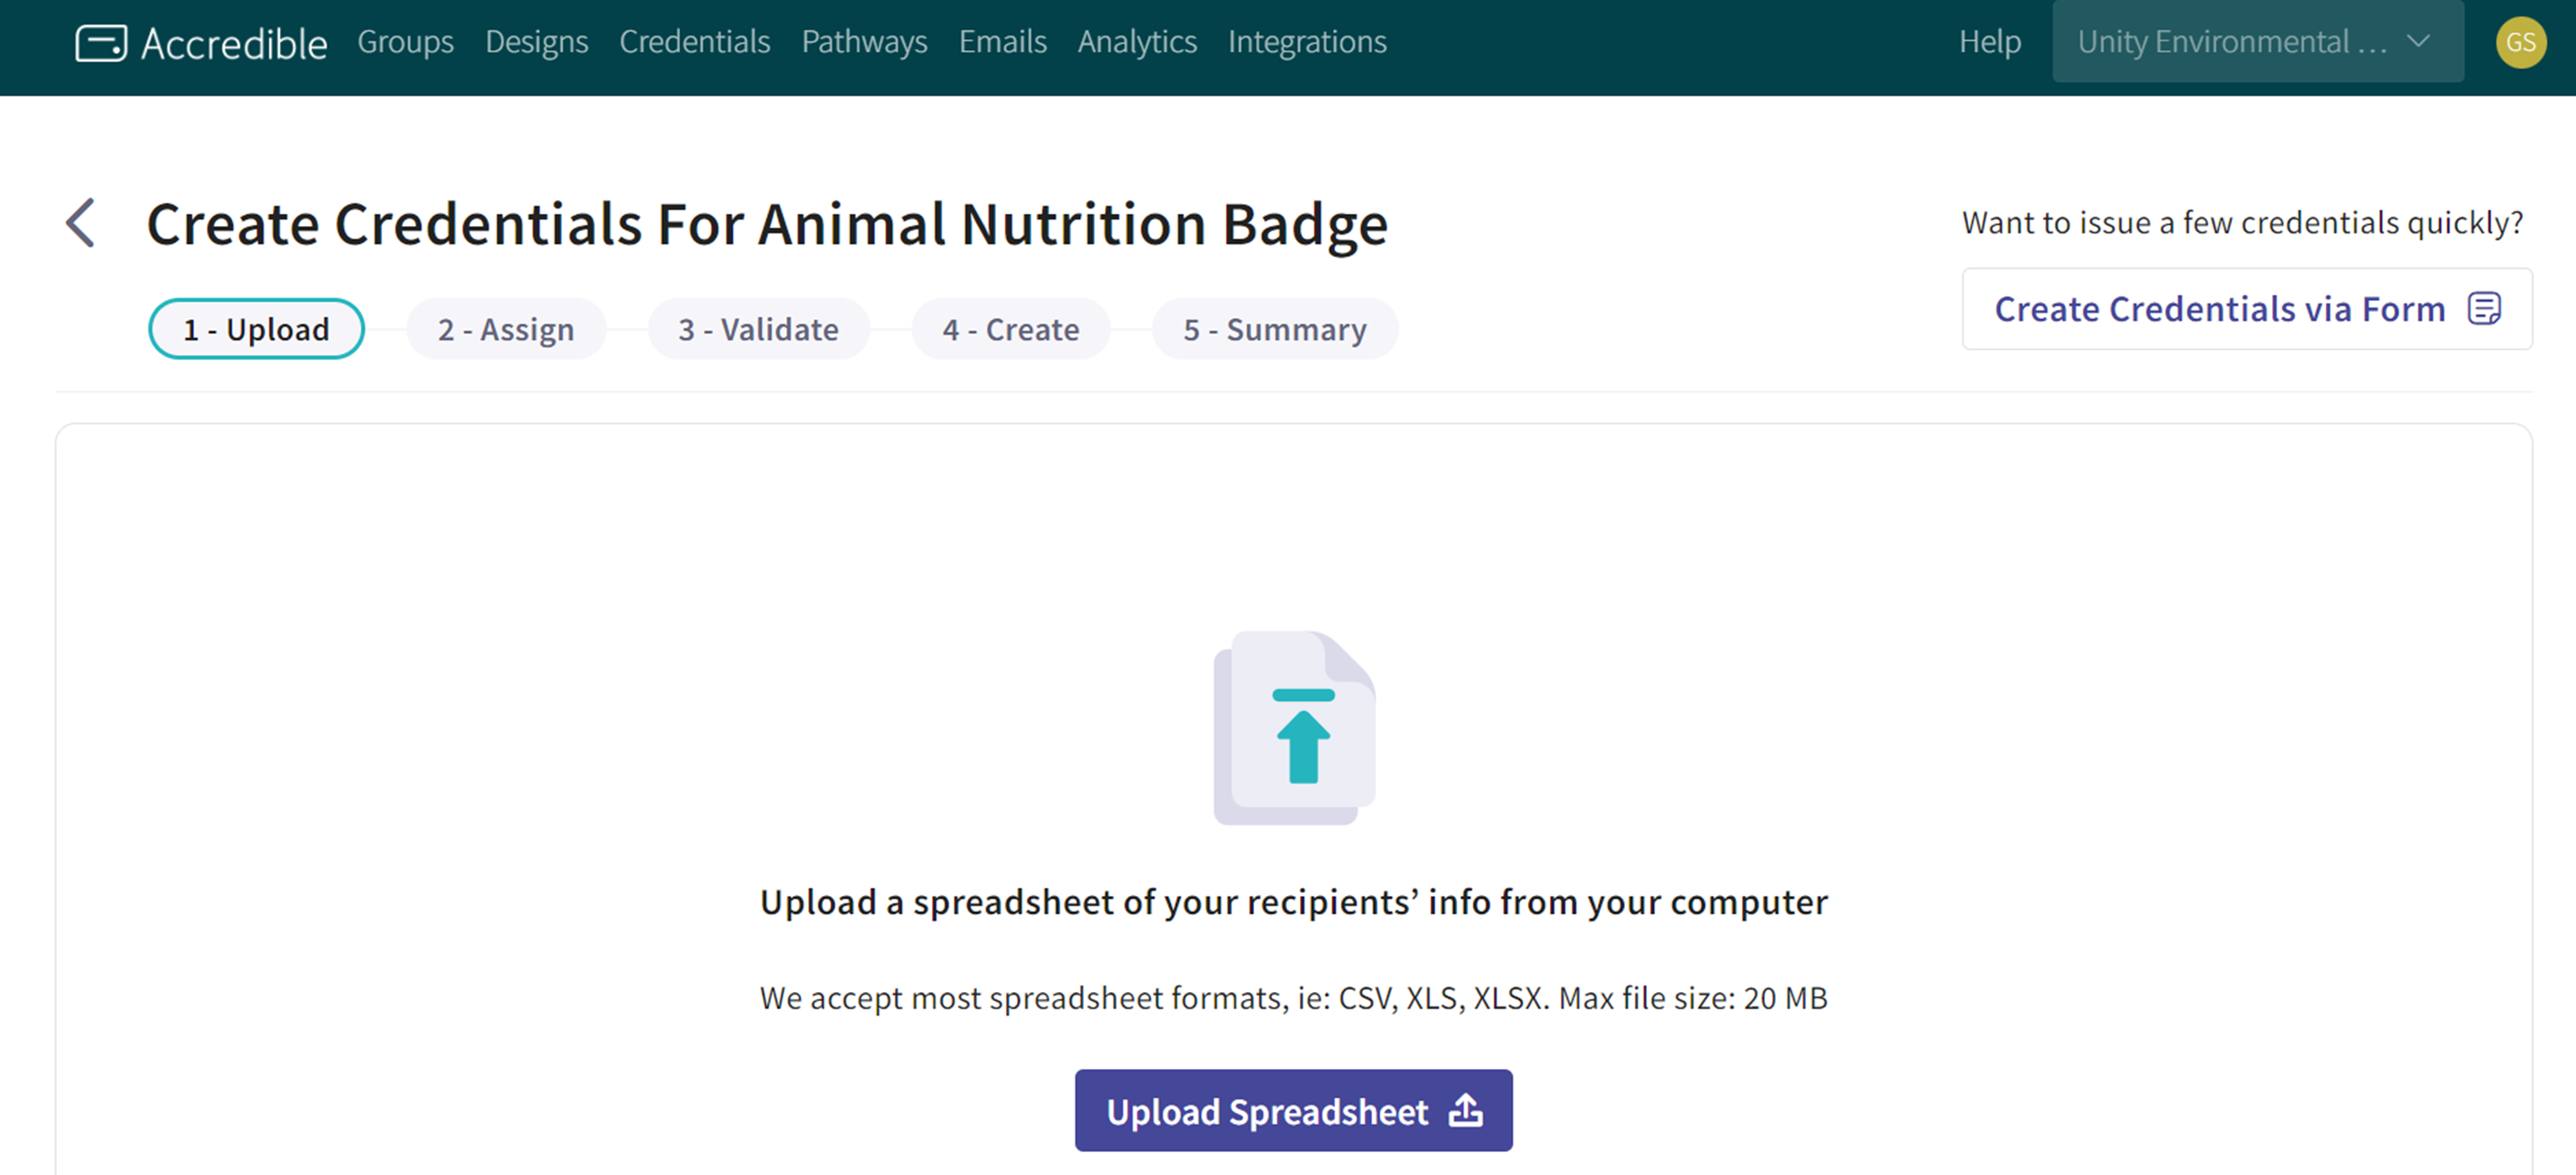
For the purpose of credentials issued through Canvas, the credential will be awarded automatically.
Setting up a Credential in a Course
In the DEV
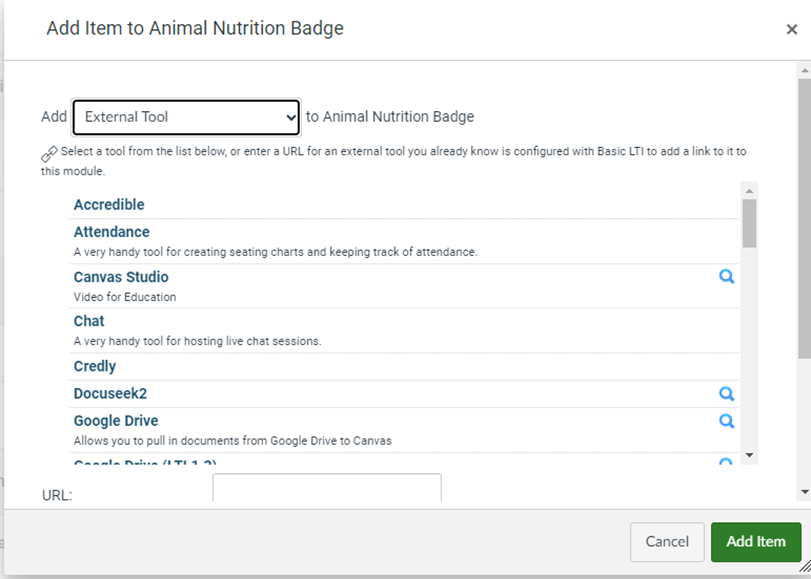
Accredible Credentials are awarded through an External Tool. To set up a credential in a course, create a module that will contain the credential. Within it, you need to add an Accredible External Tool.
Next, create a module that contains the earning criteria for the credentials(these criteria should be included within the weekly module and this module.) In this earning criteria module, create a title that lets students know that they should complete the assignments in this module within the weekly module. Also, create a page that will host Badge Information. Click the three dots in the module top bar, and set the requirements for each assignment. Once this module containing the assignments has the proper requirements, go to the module that contains the Accredible External Tool and click the three dots. Then add a prerequisite, and set that prerequisite to the module that contains the assignments(see below example.) Make sure both modules are also set to have the Course Overview prerequisite so students can’t access them before the term starts.
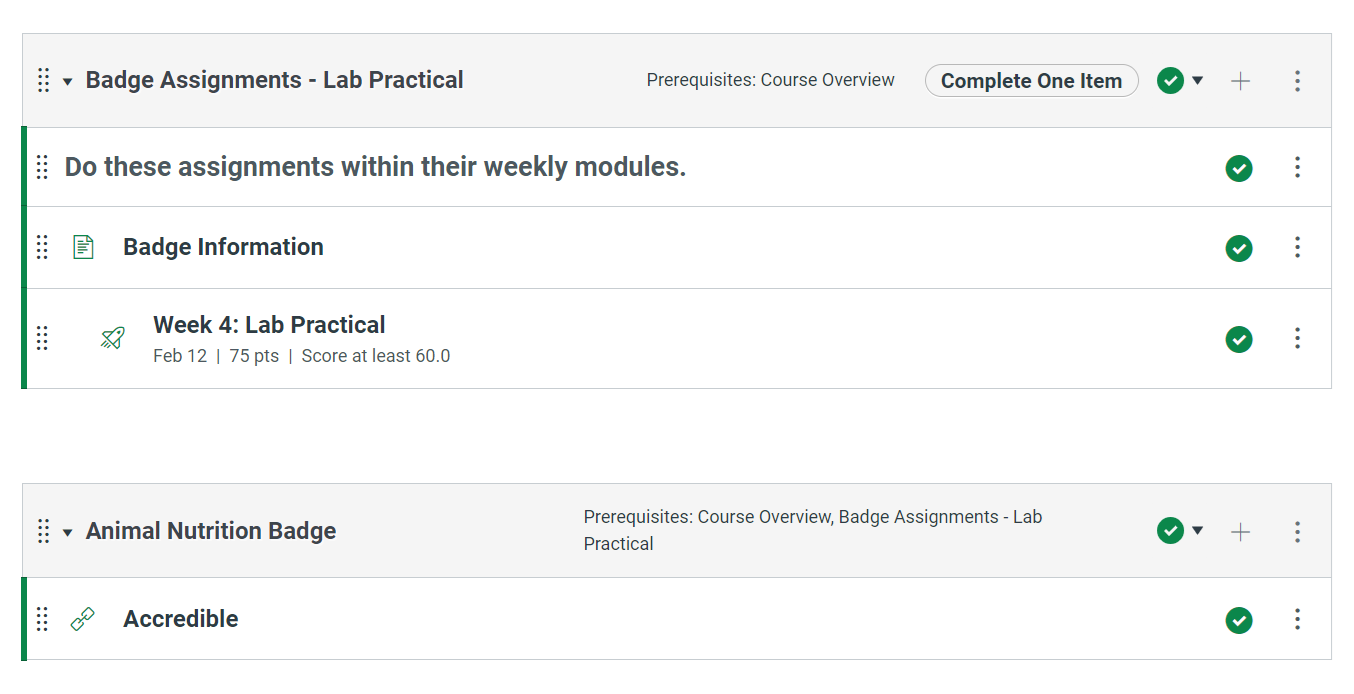
This is how the students will achieve their credential, unlocking it upon successful completion of the earning criteria. Make sure to publish both of these modules, as you can not have an unpublished module as a prerequisite to a published module. Also, make sure that the assignments module is above the badge module, as you can’t set a module as a prerequisite if it’s below in the module order.
In the BP
The module locking will survive being copied to the blueprint. Make sure to lock the assignments in the module like you would any other module before syncing to the live section.
In the Live Section
Once the course is synced to the live section, you need to go in and associate the course with the group. To do this, you will click on the Accredible External Tool in the live section of the course. This will bring you to a page that says “Not configured yet!”
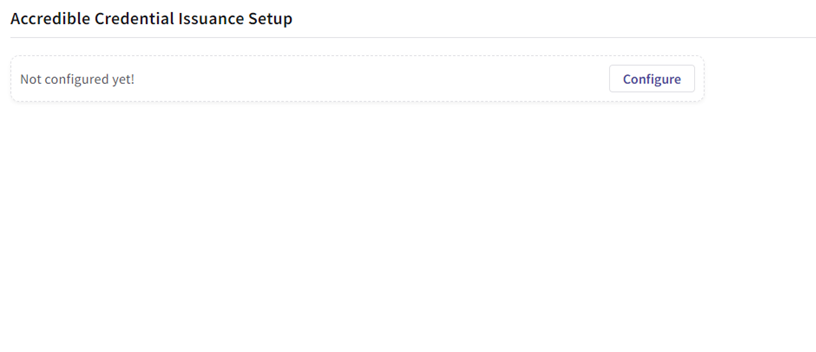
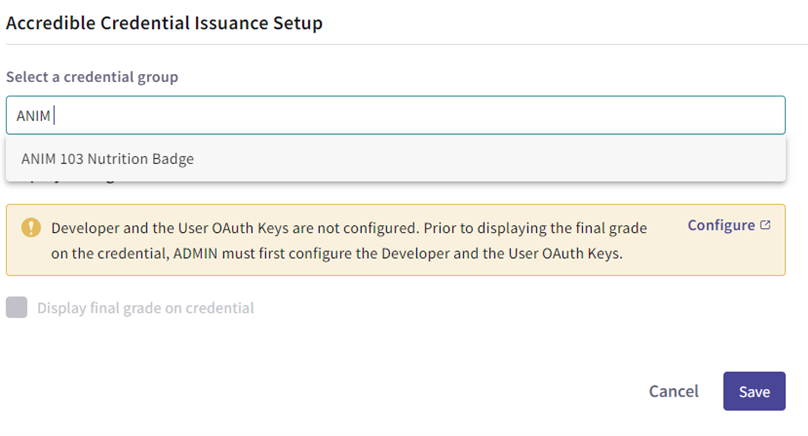
From here, click the configure button, search for the group name that the credential is in, click on it and press save.
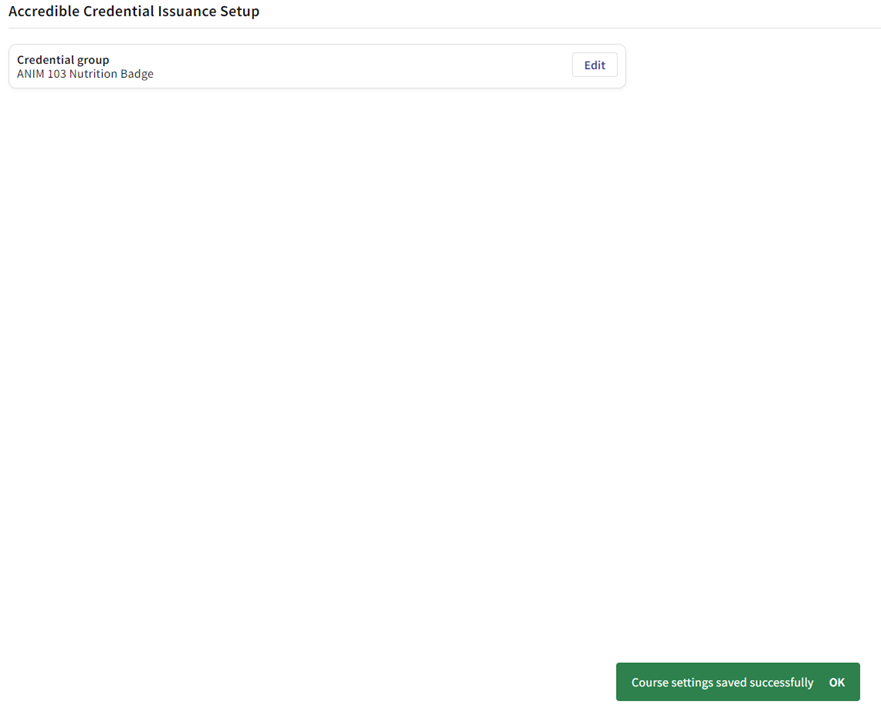
If your screen looks similar to the below image, the credential is set up and ready for the course.
Student Interaction with a Credential
Unlocking
When students complete the requirements of the module that contains the assignments, it will unlock the credential module. They can then click on the Accredible badge tool in the module, which will take them to the credential page, where they will receive their credential.
Receiving
When students click on the Accredible External Tool, they will be brought to a page that shows them the credential design and some other information, as well as a sharing tab.
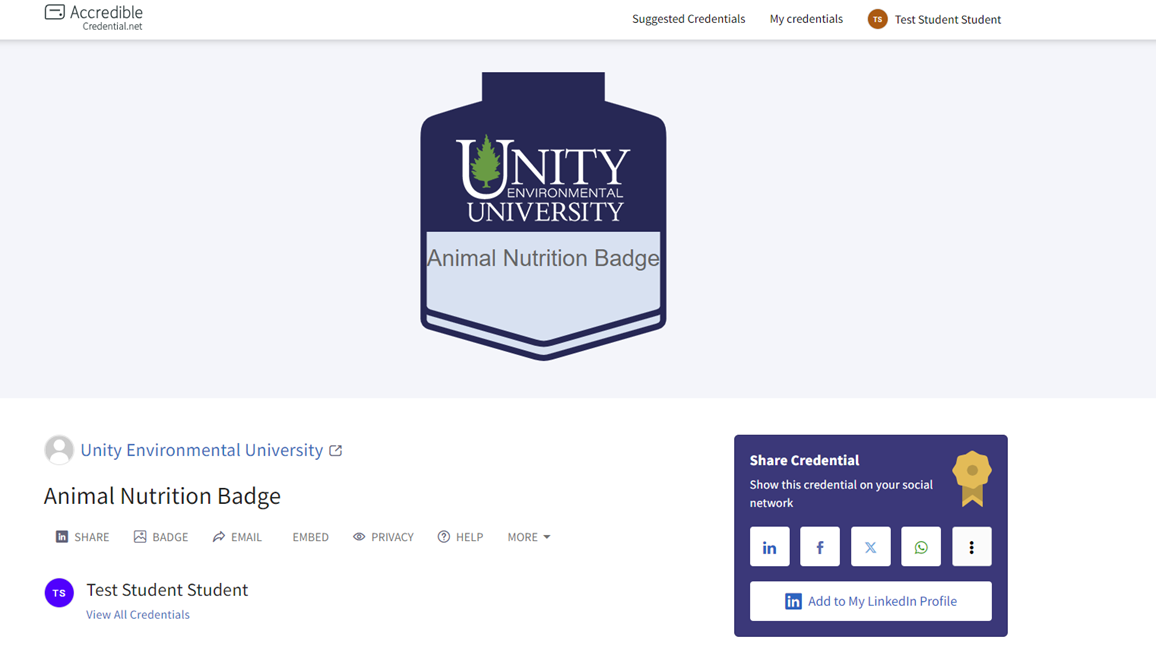
They do not need to create an account to access it because the account is auto-created with the information pulled from Canvas. The student will also get an email that will give them access to a link to this credential that they can save.
Adding Evidence
Upon receiving their credentials, receivers can add a document or a link as evidence of the work they did to earn their credential, as well as a description of the evidence they’ve provided. This allows the receiver to show how the work they have done to earn the credential is relevant.
Sharing
Students have the choice to share their credential on the credential page. They can choose to add it to their LinkedIn profile and share it on social media. If they choose, they can share a link to this credential page with anyone, who can click on it to learn more about the credential. They can also select the badge button to save a picture of the credential for use on a resume or website. Embed is also an option for website sharing.